
When a brand adds NFC authentication to its products, buyers may need more than a “verification passed” message. They also want to check the product in their hands, find instructions and contact support if something is wrong. If those resources are already on the brand website, bringing verification to the same place can make that visit more useful.
BrandGuard offers three arrangements: a result page hosted by BrandGuard; successful verification followed by a visit to your product page; or a visit to your website first, with your server requesting verification. This article focuses on the third option, the Live Verification API. You keep your website design and content while BrandGuard checks the security evidence supplied by the tag.
What happens after a buyer taps the tag?
Take a limited-edition product with a secure NFC seal. After receiving it, the buyer holds a compatible phone near the seal and opens the link. That link first reaches the brand’s own domain, so the check starts with the brand.
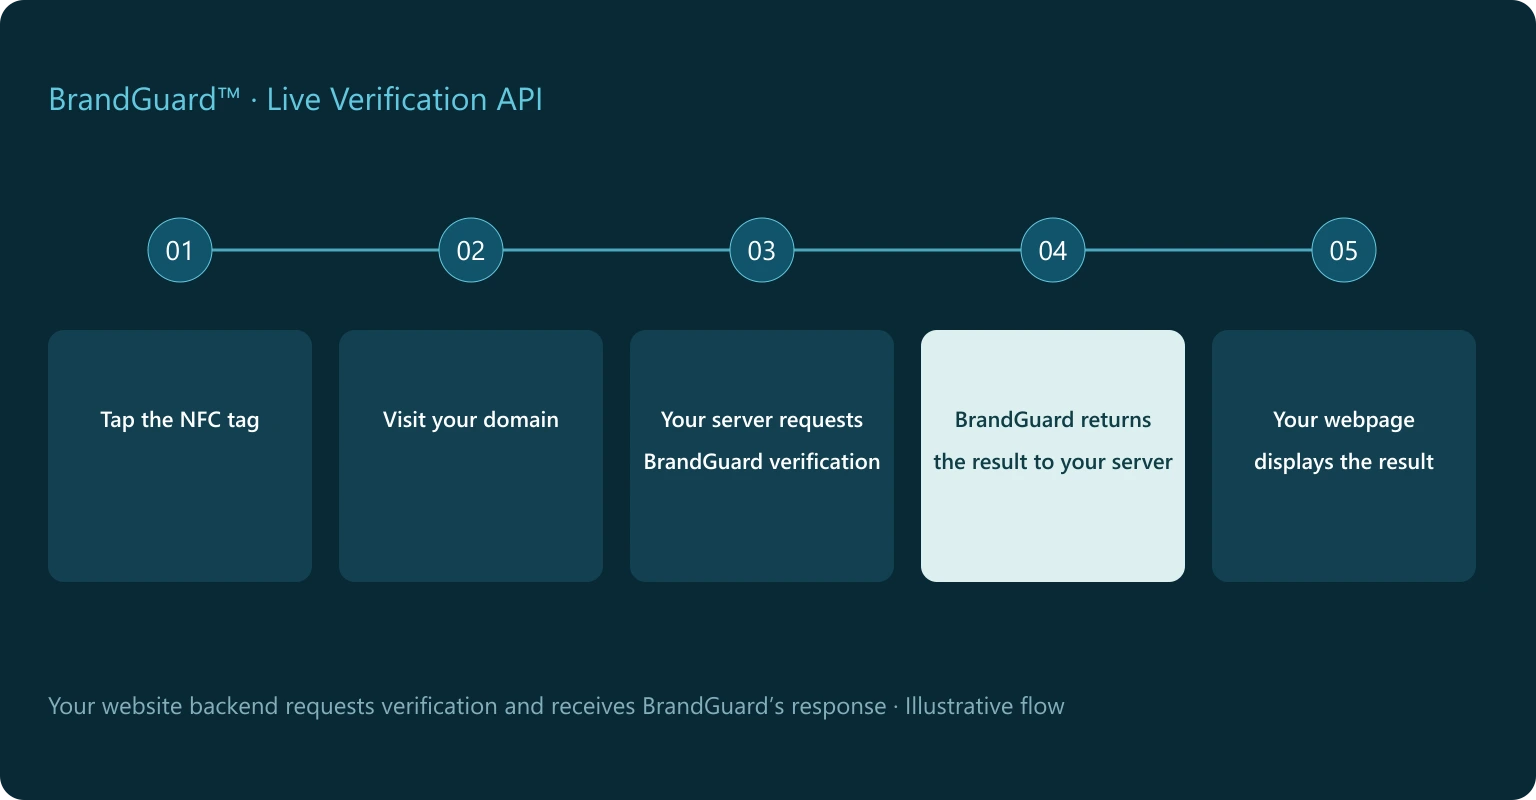
The brand’s website server, or backend, sends the current tag reading to BrandGuard. We check the tag’s cryptographic evidence and its link to the registered item, then return the outcome to the brand’s backend. That backend uses the response to present the result on the brand’s webpage and, where the item is identified, connect it with the relevant product information.
- Tap the NFC tagThe buyer uses a compatible phone to read the tag and open its link.
- Visit the brand websiteThe link first reaches the brand’s own website domain.
- The brand’s backend requests verificationThe brand’s website server sends the current reading to BrandGuard.
- BrandGuard returns the resultOnce verification is complete, BrandGuard returns the decision and available information to the brand’s backend.
- The brand’s webpage displays the resultThe brand’s backend prepares the response for display, so the buyer can see the current result on the brand website.
Website integration and tag encoding must be prepared before use.
The site can wait for verification before rendering the page, or show a waiting message while the request is processed. Either way, it needs the current decision before showing a conclusion. If no result is available, it should say that verification could not be completed, so buyers do not mistake a connection problem for evidence of a counterfeit.
Answer the questions a buyer actually has
“Did this reading pass, and does it relate to the product I am holding?” A useful result area starts with those questions. After processing the reading, the API returns the verification decision, with item identification, the number of accepted verifications and seal information where available. Some details may be absent when a tag cannot be identified or verification fails; the page should reflect that outcome.
Where an item identifier is available, the site can match it to the brand’s records and place a photograph, model and instructions beside the result. The API supplies verification information; the brand supplies the product content. Without a confirmed item association, a page must not imply that the displayed product details have been linked by verification.
The number of accepted verifications counts checks accepted and recorded by BrandGuard, not individual buyers or sales. Any count or verification time shown should come from the available data in that response. Refreshing the page, retrying the same request or opening a historical record does not mean the phone has read the physical tag again.
Make the visit useful after the check
The buyer has the product in hand and is already on your website. Beside the result, a collectibles brand could provide information about the series and care advice; a parts supplier could offer fitting instructions; a brand with warranty registration could link to that service. The buyer can continue without finding another site or searching for the model again.
Your website provides those services and uses the API’s verification information in that experience. It can retain the brand’s familiar design and give buyers a direct way to ask for help. Warranty eligibility, proof of purchase and membership benefits continue to follow your own business rules.
What does each team provide for the website API option?
BrandGuard prepares secure NFC tags suited to the product and packaging, securely encodes each tag for the chosen arrangement and operates the verification service. Hosted results, onward visits to a brand website and the website API all use BrandGuard verification. Each tag’s first destination is prepared for the selected approach.
For the API option described here, your website team provides the backend connection, receives BrandGuard’s response and prepares the result display and product association. An existing website can be used. A developer can add server-side processing on the same domain to a static site. Choosing a BrandGuard-hosted result instead requires neither a customer website nor customer-side API development.
The check concerns the tag’s cryptographic evidence and its link to the registered item; it is not an inspection of the physical product. The brand still needs to attach the right tag to the right product and maintain accurate records. Claims about composition, quality or provenance require their own evidence.
Choose hosted results, an onward visit or the website API
Start with where buyers should complete the check and whether you have a team responsible for your website. A BrandGuard-hosted page suits a brand without a website or one that wants a ready-made result page. An onward visit after successful verification brings buyers to an existing product page. The Live Verification API suits a journey that starts on your own domain.
Solution C presents these as C1, C2 and C3. BrandGuard verifies the tag in all three. The difference is where the visit starts, where the result appears and what the customer website needs to provide.
Swipe to view the full table
| Option | Where the buyer checks | What the customer prepares |
|---|---|---|
| C1 · A branded page hosted by BrandGuard | On a page configured with your branding, under the BrandGuard domain. Your logo, product images and public details can appear after successful verification, where available. | Your logo and product information; no customer website or customer-side API development. |
| C2 · BrandGuard verifies, then opens your website | After successful verification on BrandGuard, the buyer continues to the chosen static or dynamic product page. | A destination page; the official component or WordPress plugin if that page also needs to show the current result. |
| C3 · Your website requests verification through the API | The phone first visits your domain. Your backend requests verification and receives BrandGuard’s response; your webpage displays it. | The backend request and response handling, result display and mapping from item IDs to your product records. |
Each tag is encoded for its selected approach. A website setting does not automatically change the first destination already written into a tag.
For C2, the destination can be a static or dynamic product page. The connection is configured to suit the website and destination address. To show the current result on that page, use the official verification component, or the official plugin for WordPress and WooCommerce. Opening a webpage through a redirect does not, by itself, display verification information there.
A practical test: the tag passed, but the seal was open
For a sealed product, buyers may also want to know whether the package has been opened. That is a separate question from whether the tag passes authentication. A genuine tag can still pass after its seal has been torn, while also reporting an opened or changed seal.
In a staging integration test, we used an Android phone to make three fresh reads of one NTAG® 424 DNA TT tag configured for Secure E. The first two did not report opening. After the seal was torn, the third did; the number of accepted verifications progressed from 1 to 2 to 3. The test confirmed the website request, returned decision and display of the seal change for that tag, phone and test environment.
The website should show tag authentication and any available seal state separately, helping buyers decide whether to inspect the packaging or contact the brand. Standard NTAG® 424 DNA does not offer DNA TT’s electronic opening detection. If packaging condition matters to your customers, include the placement and opening behaviour of a tamper-detecting seal in the physical sample tests.
Try the complete experience with a physical sample
Share the website, product and information buyers need to see, and involve the person responsible for the website. BrandGuard and your website team can agree the tag, access route and display, then test the complete journey with a small set of samples.
Go beyond a successful tap. Check what buyers see when a tag is not recognised, a result is temporarily unavailable, they revisit the page or a suitable seal has been opened. Clear results, correctly matched information and useful next steps help people understand what was checked and where to get help.
Frequently asked questions
Can a static website use the API?
Yes, if a developer adds a backend or an edge service on the same domain. Verification requests and credentials belong on the server. A display script in the page alone is not sufficient.
Do we need to replace an existing WordPress plugin with the API?
Not necessarily. The plugin lets buyers continue to your site after successful verification on BrandGuard and see the result in the official panel. Consider the Live Verification API if the NFC link should reach your domain first and your team wants to build its own result display.
Can a website setting make an existing tag open my domain first?
A website setting does not rewrite a tag’s first destination. If the tag currently points to BrandGuard, moving to C3 requires checking its encoding and how the tag will be prepared. That is separate from configuring which page opens after successful verification.
Does an ordinary redirect bring the result to our webpage?
No. In C2, an ordinary redirect opens your webpage after successful verification. Showing the current result there also requires the official component or WordPress plugin. In C3, your backend calls the Live Verification API, receives BrandGuard’s response and supplies it to your webpage for display. C1 shows the result directly on a BrandGuard-hosted page.
Can the business data API or a historical record replace live verification?
No. Business data interfaces synchronise item information or retrieve past records. The Live Verification API checks the current NFC reading. An earlier successful record is not evidence that a new read has passed.
Discuss NFC verification for your website
BrandGuard can work with your website team to agree the tags, integration route and sample tests for your project.
Discuss website verification →